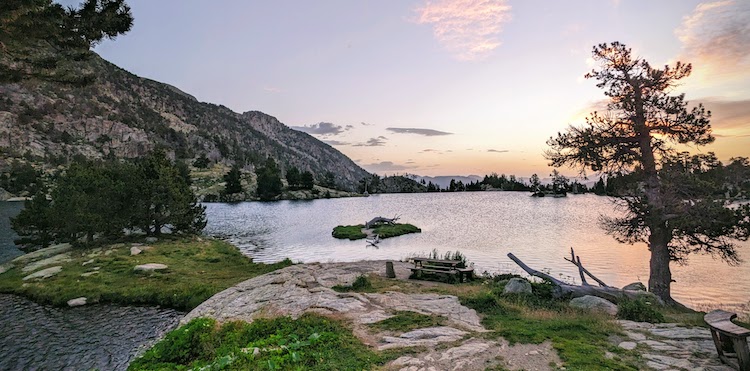
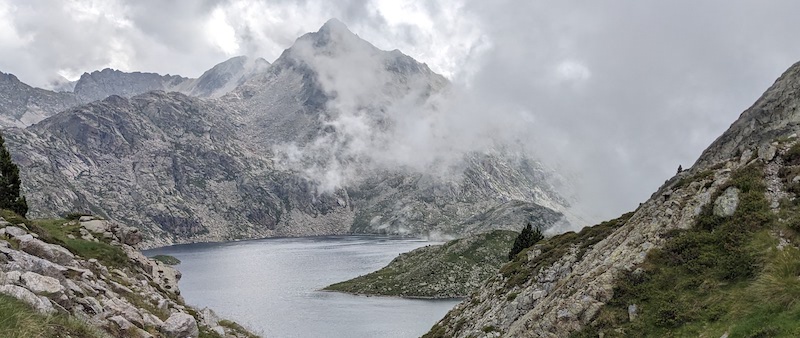
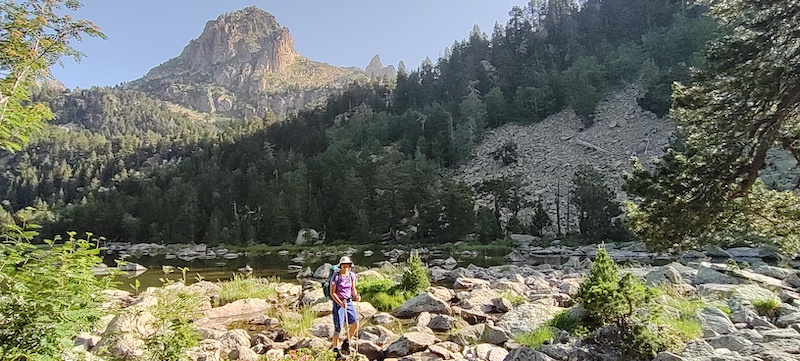
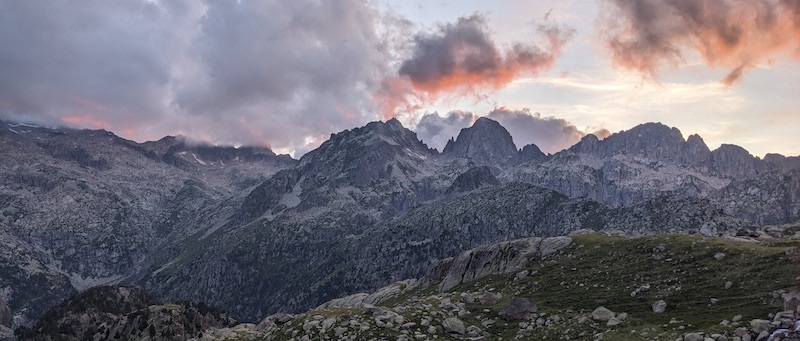
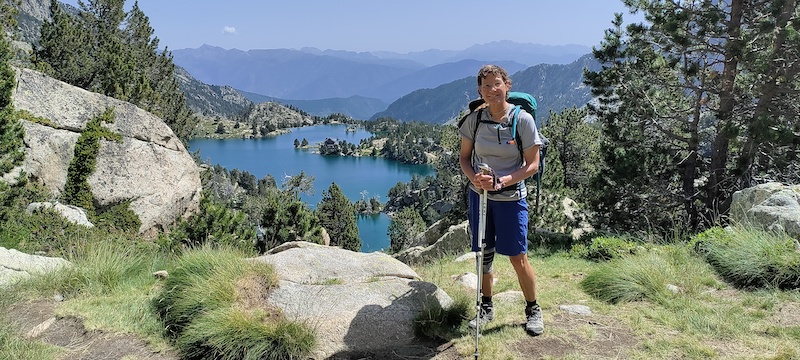
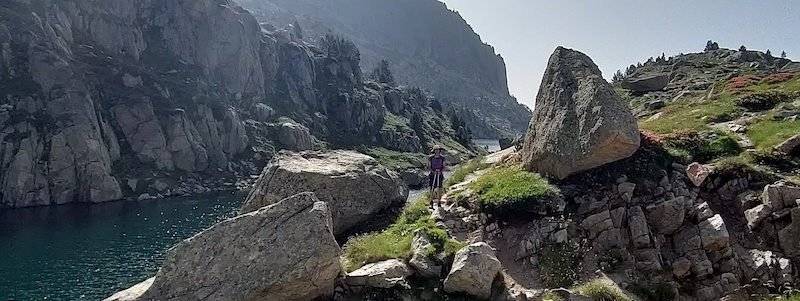
“Carros de Foc” is Catalan for “Chariots of Fire,” the name given to this 65km/40 mile loop trail in the Spanish Pyrenees. To me, however, “Meandering Waters” (Aigüestortes, the name of the national park this route explores) is a better fit due to the many lakes, rivers, and waterfalls that make this high mountain area so beautiful and unique. These contrast to the rocky moonscapes you’ll find on your way to high mountain passes surrounded by craggy peaks.
Carros de Foc started as a challenge between the wardens of nine mountain huts, who undertook the entire loop in a single 24 hour effort in 1987! Nowadays, most hikers tackle the route in five to seven days. And while there’s an “official” Carros de Foc route, trails criss-cross the entire area, making it possible to connect the huts in a variety of combinations.
In this post, I’ll cover general aspects of the Carros de Foc trail first and then describe different ways to break up the route. Let’s start, though, with some handy Catalan vocabulary for the trail:
- col/collet/coret or port = mountain pass
- estany = lake
- pic = mountain peak
- refugi = mountain hut
Although Catalan is the main language of this area, everyone speaks Castillian (ie “Spanish”) and hut wardens can help you in English if you need.
HOW HARD IS THE CARROS DE FOC TREK?
Obviously “hard” is relative, as we were reminded of when chatting with a French hiker along the way. Having competed in several 200km trail runs in the Pyrenees, he found this trip dead easy! It also depends on the daily distances and terrain. We covered the “standard” route in 7 hiking days, with the longest being 17km with ascents of three high passes for a total vertical gain of 900m (and 1200 descent). We found that the ascents and rocky terrain halved the speed we usually average over flat terrain.
For me, the most challenging aspect of this hike was the rocky trails. Only rarely are the trails flat, even dirt paths. Mostly, they’re uneven and rocky, so you’re constantly stepping up/down/around rocks at different levels. So I was glad to have built in a rest day in the middle of our hike just to give my feet and knees a break. But that’s me and my worn out, 55 year old knees! However, the distances or climbs were not an issue. (To prepare, I did several day hikes of around 20km as well as multiple 900m ascents of a local mountain in the six weeks prior to departure.)
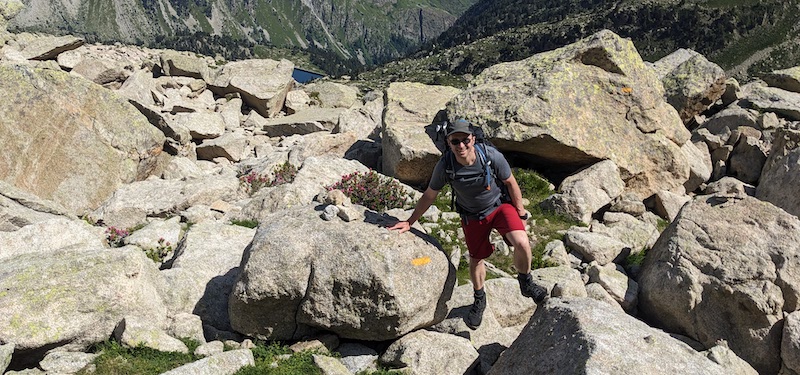
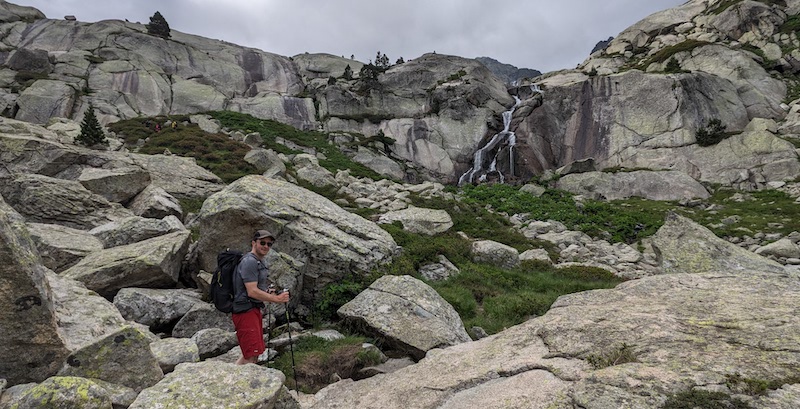
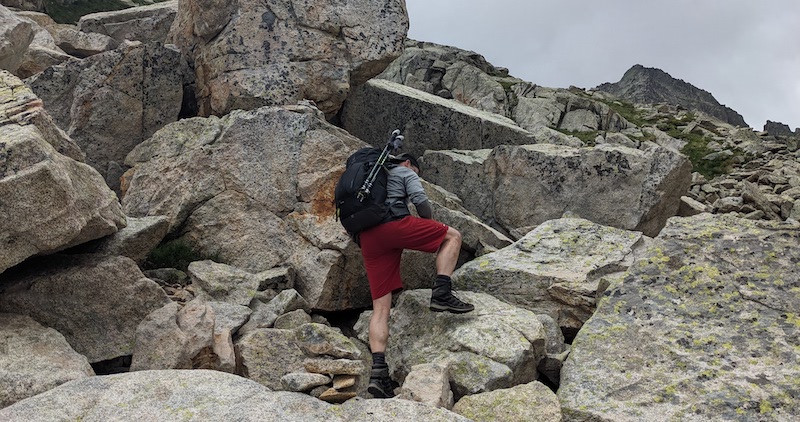
Another challenge is the extensive boulder fields you’ll traverse along this trail (especially the 2750m Collet de Contraix pass — see “Day 4” below). However, those were easier than I expected. That’s because the boulders get so big, you have more “landing space” for each step, and the surrounding boulders are usually high enough to reach for balance. The best comparison I can think of is a beginner’s route on an indoor bouldering wall set at a 45° slope instead of vertical. So, even the longest boulder fields weren’t technically challenging, and I found myself actually enjoying the puzzle aspect of where to put each foot and hand. Even if you reach a really difficult spot, you can simply back up a step or two and find an alternative way over or around that particular boulder.
ROUTE FINDING along the Carros de Foc trail
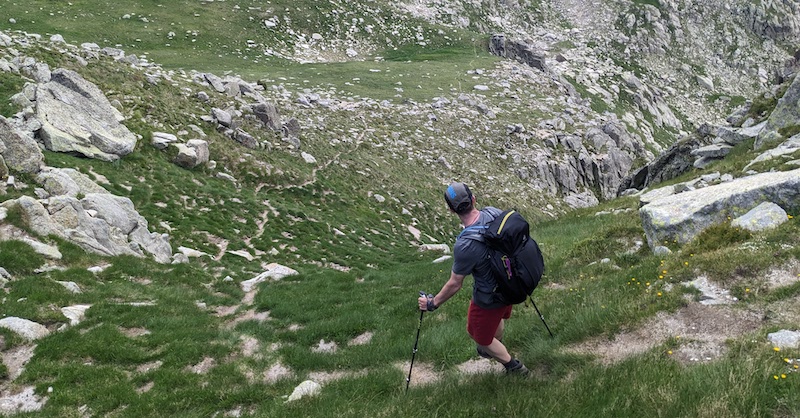
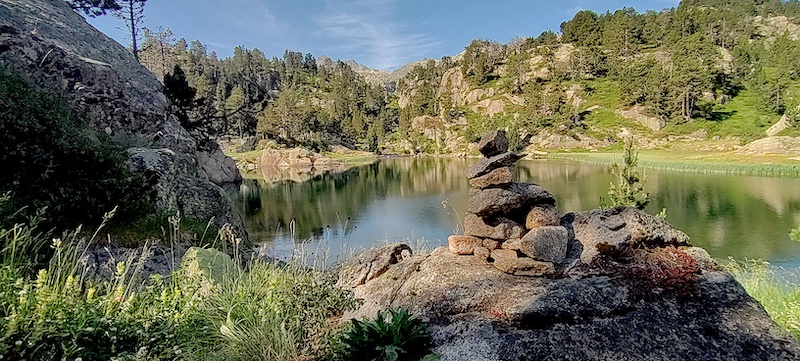
In most places, the trail is easy to follow, and there aren’t many unmarked forks where you might get confused. Amidst rocks and boulder fields, you’ll find cairns (stacks of rocks) and/or paint stripes to help you stay on the trail. However, you do need to keep a sharp eye out for these. We managed to lose our way a few times in both grassy and rocky terrain. This isn’t a big deal unless the clouds roll in and reduce visibility significantly.
The best map for this hike is the “Carros de Foc” 1:25,000 map from Editorial Alpina which clearly indicates the official route along with all alternative trails plus contour lines and other relevant features.
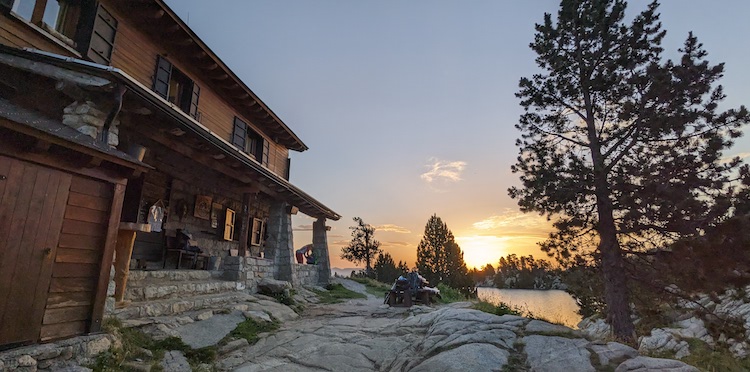
MOUNTAIN HUTS / REFUGI along Carros de Foc trail
Camping is not permitted in national park territory, so the only option for overnighting is in mountain huts (refugi). None are super fancy, and some are more basic than others, but the location always makes them a treat. You’re required to bring your own bed liner, while mattresses, pillows, and blankets are provided.
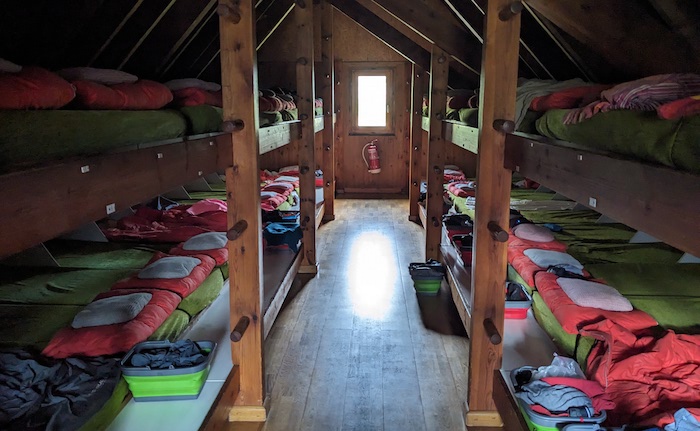
Most huts have large bunk rooms with up to 50 people in one big room. You might end up arriba (on the top level of these super long bunk beds) or abajo (the bottom level). Some have dividers at the head/shoulder area to provide a little privacy, but be prepared for one big sleepover-style atmosphere. Despite nightmare stories of terrible snorers, I slept like a log every night. (And no — I was assured I wan’t the snorer!)
Luckily, you can make reservations for the huts on one online platform. There’s a €15 deposit per person per night which can be fully/partly refunded 15/7 days ahead of time. Certain huts will begin to sell out for certain summer nights as early as April, but I was still able to reserve every hut on my list by sliding my dates forward by a few days.
Most huts charge approx. €40 total per person per night. You’ll pay the remaining sum directly to each hut. Many huts require CASH payment, so come prepared to pay the full amount (including meals) in cash.
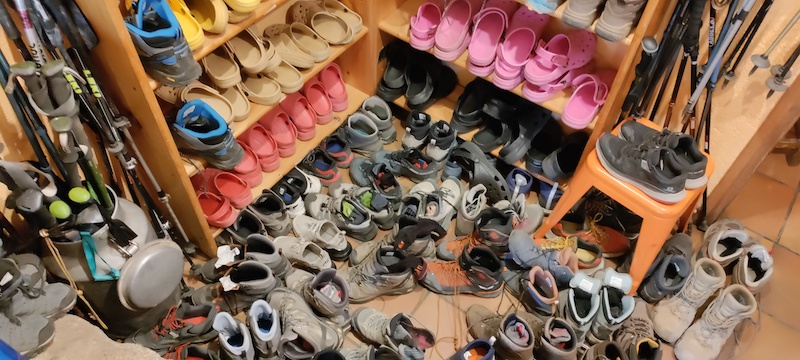
Every huts has a dining room that’s open all afternoon, and many had board games too. Most huts close for cleaning shortly after breakfast (usually served around 7am), so you have to clear out by 9 or 10am at the latest.
All the refugi have toilets, showers (some free, some €2-€4), and power to charge your devices. We brought power banks that we never used, because we were able to top up our devices every evening (phone and e-reading device). Unless you carry an unusually big load of power-hungry devices, there’s no need to bring a power bank.
MEALS
The refugios offer meal plans, and everyone we met went for the mitja pensió/media pensión plan (half pension - ie, dinner and breakfast). In most huts, this meal plan costs a hefty €60 or more, so that’s where expenses really add up. There isn’t really a practical alternative if you want warm meals, however. Some huts offer “kitchens,” but I never saw more than a sink/counter space in these (no stoves, no boiling water).
On the flip side, hut dinners are hearty four-course affairs, with a simple soup, fresh salad, main course, and basic dessert, all served family-style at assigned tables at assigned times (usually 7pm). We found the dinners at Ernest Mallafrè and Saboredo a little bland (lentils, lentils, more lentils…) but filling, while we were happily surprised by roast beef, lasagna, and chicken dinners at other huts. It’s also possible to request vegetarian meals.
Breakfast was a lackluster affair in most huts, with very plain bread or crackers, cold cuts, sometimes with jogurt/cereal, and always with your choice of cofee/tea/hot chocolate.
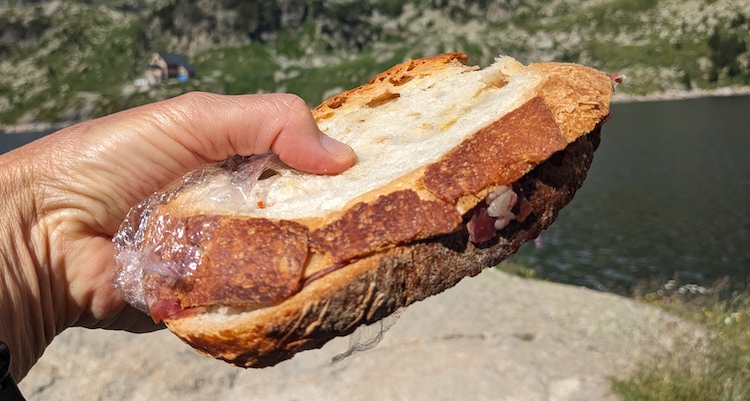
For us, paying for mitja pensió was a no-brainer because of the weight it saved us carrying. All huts also offer a picnic lunch which are steep at €12-15. Again, these let you carry less weight overall, but you’re stuck with whatever they pack for you (usually, a very plain ham sandwich plus trail mix/nuts/granola bar and an apple, orange, or apple sauce). I personally found the lunches to be generous in quantity but plain, with enough little goodies to keep me snacking throughout the day. Still, it makes sense to bring some of your own snacks just in case.
As for drinking water, you can refill at any hut. With so many rivers and lakes around, it is also possible to refill along the way, but this water must be treated to be safe.
WEATHER
This is a high altitude mountain area, so extreme weather is always a possibility, even if most summer days are pleasant and fair. One source for weather reports is meteoexploration.com, where you can enter the name of a refuge to get the forecast/conditions at that altitude. The huts’ umbrella organization also has a “weather forecast” tab for many of the huts. Some of the huts have their own websites with webcams and forecasts, such as this one for JMBlanc hut.
OVERVIEW of the CARROS DE FOC TRAIL
Most people tackle this 65km/40mi loop trail in five to seven days. We did it in seven, starting and ending in the town of Espot. Another convenient entry point is via the Restanca hut (see “getting to the start/finish” below).
You’ll notice the daily distances are quite modest, so some stages can be combined. However, your walking speed up here will probably be half what you usually cover on flat terrain. Some hikers plan for modest daily distances between huts and add on an ascent of a local peak in the afternoon after ditching most of their gear at a hut.
Below is an overview of what to expect on each stage for planning purposes. While out on the trail, we used the Carros de Foc chapter in Brian Johnson’s thorough Shorter Treks in the Pyrenees guide (Cicerone Press; includes maps and hiking profiles).
Day 0: Espot to Ernest Mallafrè hut (1893m) - 4km, ↑260m
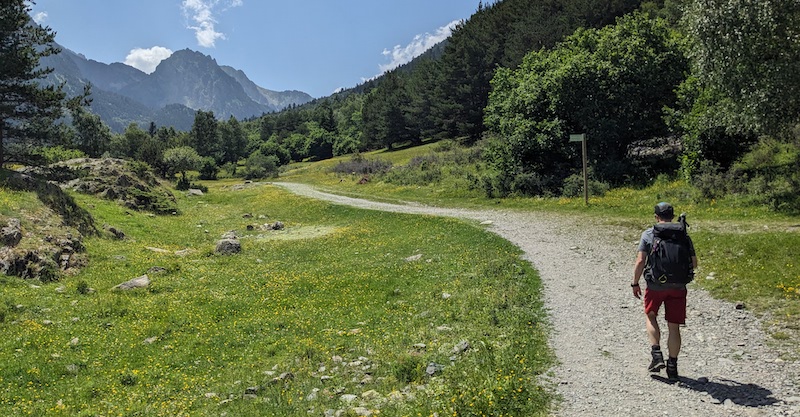
I’ll list this as Day 0 because you need to reach the loop trail from lower altitude first. From Espot’s Prat de Pierro parking lot (free and clearly signed from Espot town, 4km away), it is an easy, gradual uphill walk to Estany de Sant Maurici (lake) and Ernest Mallafrè hut (one hour total).
If you overnight in Espot, you can do this short hike and immediately jump into day 1 of the hike without an overnight at Ernest Mallafrè hut. If you’re arriving later in the day, you can spend a night at Ernest Mallafrè, or you can hike up from the car park to Estany de Sant Maurici lake, then continue another 90 minutes to Amitges hut (halfway along Day 1 of the route).
Ernest Mallafrè is a very basic hut located a short hike away from Estany de Sant Maurici. It has the tightest, smallest bunk room of all the huts we visited — 26 people in one sardine can of a room, but we still slept well. Meals were very basic, but there is internet and you can pay with credit card here.
Day 1: Ernest Mallafrè hut to Saboredo (2299m) - 12km, ↑700m, ↓300m
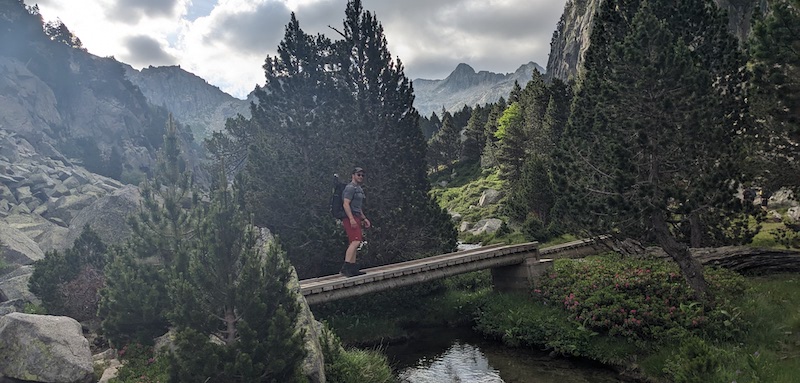
Heading away from Estany de Sant Maurici’s day trippers, you’ll find the pretty Cascades de Ratera (waterfall) 30 minutes into the hike and many beautiful, secluded lakes as you continue onward. You’ll cross a short boulder field on the way to Amitges hut (90 min. from the start) and continue steadily uphill to Port de Ratera (a 2594m pass). If it’s not too windy, it’s a great place to picnic before continuing steadily downhill to Saboredo hut. This route is easy to follow thanks to signs and paint marks (yellow/white at times, red/white at others).
Saboredo is a beautifully located hut with one big bunk house for all guests. Meals were quite basic here and payment is cash only.
NOTE: it is possible to shorten this route by cutting directly from Port de Ratera pass to Colomèrs hut (see “Carros de Foc 4 day alternative route” below) through an area packed with many more lakes.
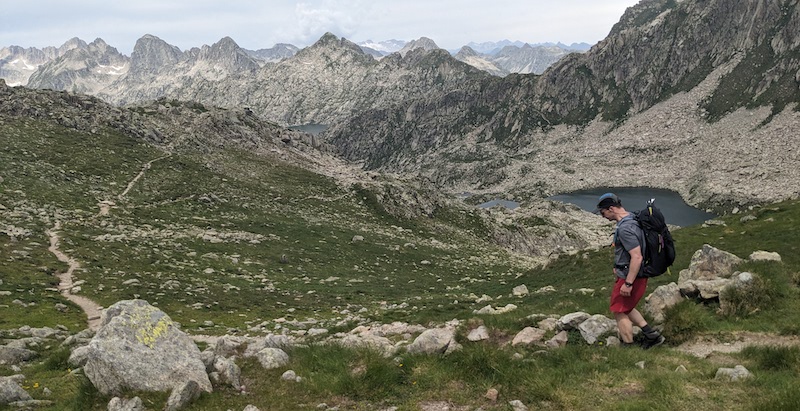
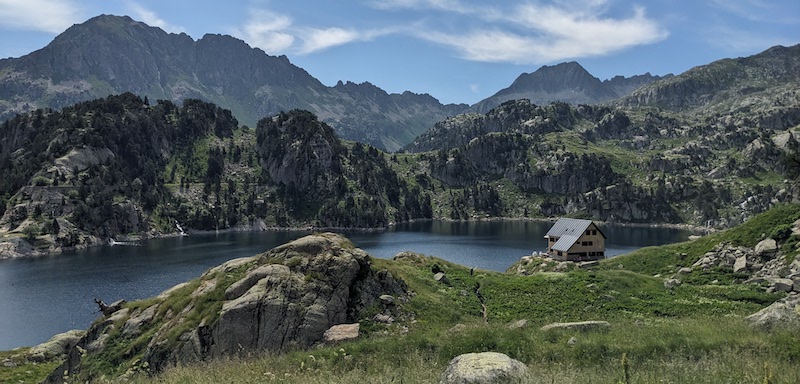
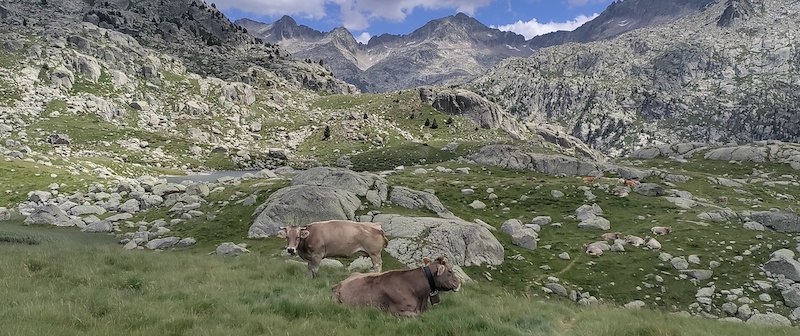
Day 2: Saboredo to Restanca (2010m) - 17km, ↑900m, ↓1200m
This is the longest day of the route with 3 passes and several short boulder fields to traverse. The first pass, Col de Sendrosa (2451m), comes early in the day, with great views. From there, you’ll descend to a valley with lakes and meadows, following signs to Colomèrs hut. From there, follow a sign to Rifugi di Lac, then another for Restanca to head uphill along a river to Port de Caldes (2672m), the first of two back-to-back passes. From the pass, you dip briefly into a harsh and rocky (but beautiful) valley, then climb again to Coret de Oelhacrastada (2475m). From there, it’s all downhill to Restanca. The last, long section is very scenic but the rapid descent on fairly steep trails made this stage feel longer than it apeared on paper.
Restanca is a big, comfortable, lakeside hut with space for 80 guests divided throughout several separate rooms. It has internet and accepts credit cards.
NOTE: it is possible to cut one day off this loop by cutting off Restanca and following the marked trail directly to Ventosa, one hour away. We enjoyed Restanca, but in many ways, the scenery was more of the same superlative scenery elsewhere along the trail, so this would be an easy day to cut.
Day 3: Restanca to Ventosa (2215m) - 11km, ↑600m, ↓400m
Note: The full name of the Ventosa hut is Refugi Joan Ventosa i Calvelli.
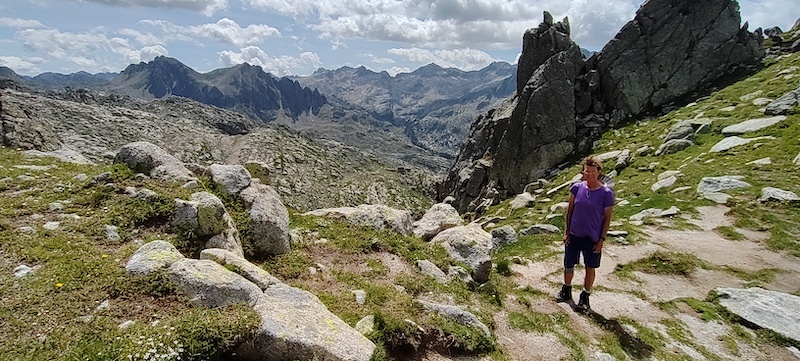
This is a very short stage, but combining stages to go all the way to Estany Llong via Collet de Contraix is a lot to bite off, so it’s a good day for a lazy start or long picnic break along a lake (such as the pretty Plan de Mar area not far above Restanca) or at Coll de Tumeneia pass (2604m). You’ll traverse a fairly long boulder field on your way to the pass which will give you a preview of what to expect at Collet de Contraix the following day. Keep a close eye out for yellow paint slashes to navigate the boulder field.
It took us two hours to reach the pass from Restanca and another two hours to Ventosa, including a detour in the last kilometers where we lost the trail. Keep a close eye out for trail markers!
Ventosa hut commands a windy location high above a lake with views to dramatic peaks all around. There’s one giant, 50-person bunk room and good meals. Payment is cash only.
Day 4: Ventosa to Estany Llong (1987m) via Collet de Contraix - 14km, ↑800m, ↓1000m
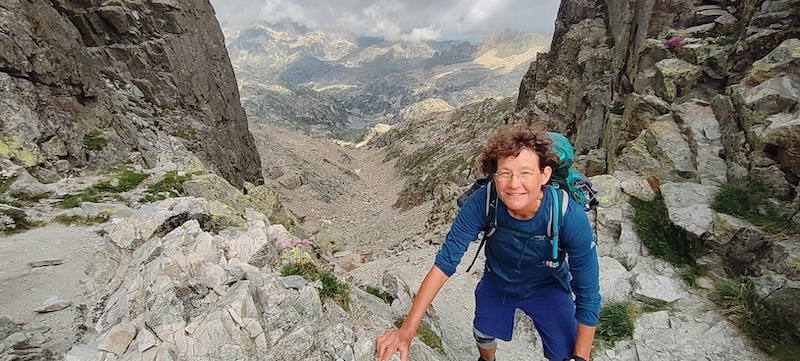
This stage is the most challenging of the entire trail with a long, steady ascent from Ventosa to Collet de Contraix (2750m pass) over fields of huge boulders. That section is definitely more intimidating on paper than in real life. I actually found it to be quite manageable and even fun.
However, on the last part of the ascent to the pass, there’s a short, steep section with very loose gravel that really made me uncomfortable. It was so hard to hang on to that I took a steeper route over protruding rocks since those offered more solid footing and handholds (it’s very steep, so you’re scrambling on all fours at that point). Other hikers agreed, describing that short section as scary, sketchy, and precarious. (On the other hand, the French trail runner didn’t find it hard at all…) It’s certainly not a via ferrata type experience (a route with metal handholds or places to clip in to), but it was challenging — and not recommended in bad weather for any level of hiker.
After the pass comes a rather steep downhill and more boulders (many, many more) as you descend to Estany Llong in three long “steps.” The first “step” is a high, rocky bowl with one lake. Then comes a switchback descent to “step 2”, a pretty green valley full of babbling brooks and patches of pine trees. In “step 3”, you’ll descend from the high alpine area to more gentle, woodsy terrain at the altitude of Estany Llong.
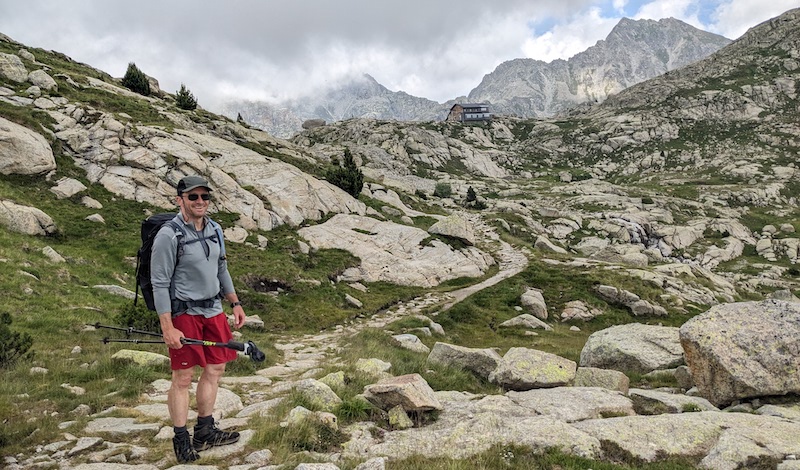
Estany Llong hut offers internet and payment by credit card. It has one giant bunk room and a large, covered outdoor seating area. Dinner was one of the best along the route. The lake is only a few minutes walk away, so we spent a rest day in this area very comfortably.
Day 5: Estany Llong to Colomina (2420m) - 14km, ↑800m, ↓400m
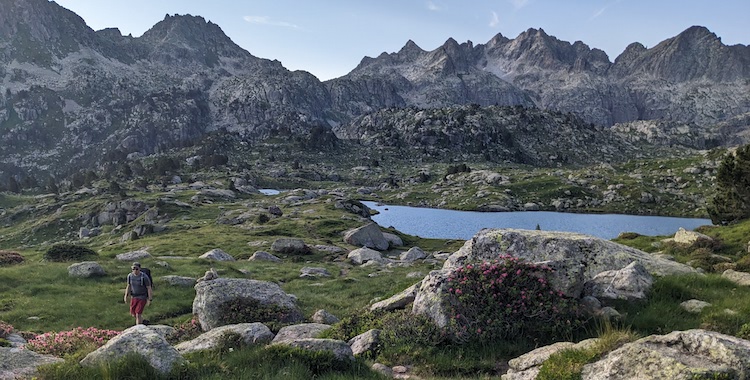
This stage is a bit of a relief with smoother, less rocky trails over more grassy terrain. First, there’s a gradual climb to Colladeta de Dellui (2577m), followed by a long, meandering descent through an area packed with lakes. Keep your eyes open for trail markers — we lost the way for a while here.
Colomina hut offers internet but payment can only be made in cash. It has several smaller bunk rooms and a nice dining area with huge windows to take in the majestic views. Our dinner here was one of the best on the trail.
NOTE: it is possible to cut 2 days off this loop by following the marked trail directly from Estany Llong directly to Ernest Mallafrè (total 2.5 hours). However, Colomina and JM Blanc huts are the most scenic along the entire circuit, so they would be a shame to miss.
Day 6: Colomina to JM Blanc (2318m) - 9km, ↑400m, ↓500m
This is another awkwardly short day but the alternative — combining stages to go all the way to Ernest Mallafrè — makes for a really long day (even if you reduce the distance slightly by using the shortcut at the “pinch point” of the Carros de Foc trail). On the other hand, this stage is chock full of beautiful lakes, big and small, so it’s easy to pass time soaking in the views. Alternatively, you could hike to JM Blanc more quickly and ascend one of the neighboring peaks for a more active day.
From Colomina hut, you’ll set off around the “backyard” lakes and climb steeply to Pas de l’Os (a small notch in a craggy ridgeline, 2542m) shortly after. Then you continue ascending to the “real” pass, Collada de Capdella (2668m) at the halfway point of the day. Up until that point, the terrain is rocky and harsh. After the pass, you’ll descend to a lush, green landscape full of lakes and streams that’s an absolute delight. (Note the sign from Estany de la Llastra to Ernest Mallafrè. The trail backtracks here to continue to Ernest Mallafrè the next day — but see note below.) Finally, there’s a last, woodsy descent with views of beautiful JM Blanc hut.
JM Blanc hut (full name: Refugi Josep Maria Blanc) offers internet and payment by credit card. It has several bunk rooms of about 12 people each, a gorgeous lakefront location, and a lovely deck right over the lake.
NOTE: this stage is short enough to hike to JM Blanc and then continue to Espot via the jeep road all in one day (2 hours downhill, see Day 7). It would be a shame to rush by JM Blanc, but you could easily spend an hour or two at the lake there and descend to Espot later in the afternoon.
Day 7: JM Blanc to Ernest Mallafrè and Espot - 12km, ↑500m, ↓900m
To finish the “official” loop to Ernest Mallafrè hut, you’ll need to backtrack uphill to Estany de la Llastra, then follow signs to Ernest Mallafrè and Estany de Sant Maurici. That will lead you over a long ascent to Coll de Monestero (2716m), followed by a steep, then more gradual descent to lush meadows and eventually, the day’s finish at Ernest Mallafrè and Estany de Sant Maurici. You can spend the night at Ernest Mallafrè or continue one hour downhill to the Prat de Pierro car park and Espot.
NOTE: it is also possible to descend directly from JM Blanc to Espot and the Prat de Pierro car park via a marked jeep road (2 hours). You’ll be missing scenery everyone raves about on the way to Ernest Mallafrè, but it’s a good option if you’re pressed for time or if the weather is poor.
CARROS DE FOC 4 DAY ALTERNATIVE ROUTE
If you don’t have the time to take on the full 7 day hike, there are some alternatives. I’ve seen three-day routes described, but those barely scratch the surface of the area. However, the following four-day loop is a good alternative that still takes you into the heart of this spectacular mountain area:
- Day 1: Espot to Ernest Mallafrè and on to Colomèrs hut - 10km, ↑700m
- Day 2: Colomèrs to Ventosa - 10km, ↑560m
- Day 3: Ventosa to Colomina - 14km, ↑800m
- Day 4: Colomina to JM Blanc and on to Espot - 17km, ↑400m
Day 1 of this alternative cuts off the Saboredo section of the first day in the main route described above, but the other three stages are as described above. We’re glad to have done the full 7 days (actually eight, including a rest day) because it gave us a chance to slow down and “detox” from work, the all-consuming internet, and so on. Still, this four-day alternative would be a good option if you’re pressed for time.
GETTING TO THE START/FINISH of CARROS DE FOC
The circular nature of this route makes it convenient to transfer in and out from a single place. For us, that was Espot, a town 3.5 hours from Barcelona by car. The national park service offers a free shuttle bus to entry points like Espot: go to this link and scroll to the bottom for the “Horarios Pla de l’Ermita-La Pobla de Segur” schedule. However, it was easier and cheaper to rent a car in Barcelona (9 days for under €100 for a small Fiat), park in Espot’s Prat de Pierro car park (free, operated by the national park). Another option is to travel via car or bus from Toulouse in France, entering the trail at the Restanca hut. However, the bus connections are equally tricky there (the public bus from Toulouse to Vielha only runs around midnight/2am, after which you have wait for the free national park shuttle in the morning).
CLOTHING/EQUIPMENT
For our early July hike, we did well bringing two of all the basics - T shirts, underwear, socks, using the wear one, wash one method. During our July hike, temperatures were comfortably in the low 20°C/low-mid 70°F with clear or sightly overcast skies. Obviously, that’s no guarantee you’ll experience the same, so check the forecast before you head out (see “weather” above). It does get cool at the higher elevation huts and on windy days, but we never found it cold enough to need the “emergency” long underwear layers we brought. I did wear bike leggings with shorts at times and found that to be a very practical alternative to pants. At the height of summer, temperatures can get extremely high even at this altitude.
Because we weren’t carrying much food, I could fit everything into my 24L backpack. I did wear my warm hat & gloves one day when the clouds rolled in and temperatures dropped, but most of the time, a T-shirt and shorts was perfect. I read that it’s not unusual to see snowfields in July, but we never had to cross snow or ice. All we encountered were a few snow patches clinging to shade off the trail.
WHAT TO PACK FOR THE CARROS DE FOC TRAIL
- 24-35L backpack
- hiking poles
- hiking boots
- 2-3L water system
- lightweight waterproof jacket
- bed liner
- 1 long sleeve shirt
- 1 warmer layer
- 2 T-shirts
- 2 comfortable socks
- 2 underwear
- 1 pair hiking shorts, convertible pants, and/or bike leggings
- thin hat & gloves
- sun hat
- camera
- reading device/other entertainment
- snacks
- mosquito repellant
- sunscreen
What NOT to bring: a power bank for charging your device, excessive warm layers, and a bathing suit. Yes, there are lots of tempting lakes along the route, but swimming is not permitted in the national park. We did enjoy soaking our feet in streams along the way, though!
You can also listen to my interview on the Trails Worth Hiking Podcast about our experiences on the trail.
All in all, Carros de Foc was a memorable, challenging, and rewarding hike we truly enjoyed and can highly recommend. I hope this post has been helpful and interesting, either as a planning tool or armchair adventure. For other exciting trips and ideas, click on “HOME” at the top of the page. Thank you for visiting TheTravelBug.blog and happy travels!